AidLux Full Package Installation
Reminder
Flashing will format the system, please back up your data in advance.
Flashing Tool Installation
When using the Rhino Pi, developers need to pre-install necessary software on their local Windows computer. The required software is as follows:
- USB Driver: USB_Driver_qud.win.1.1_installer_10061.1.zip
- System Flashing Tool: QPST_2.7.496.zip
- ADB Tool: platform-tools.zip
Software download link: Software Tool Installation Package Download Link
USB Driver Installation
System Flashing Tool Installation
ADB Tool Installation
Full System Package Installation
ROM Package Download
Please visit the Android Image download link to download the full system package image for flashing.
Switching to Flashing Mode
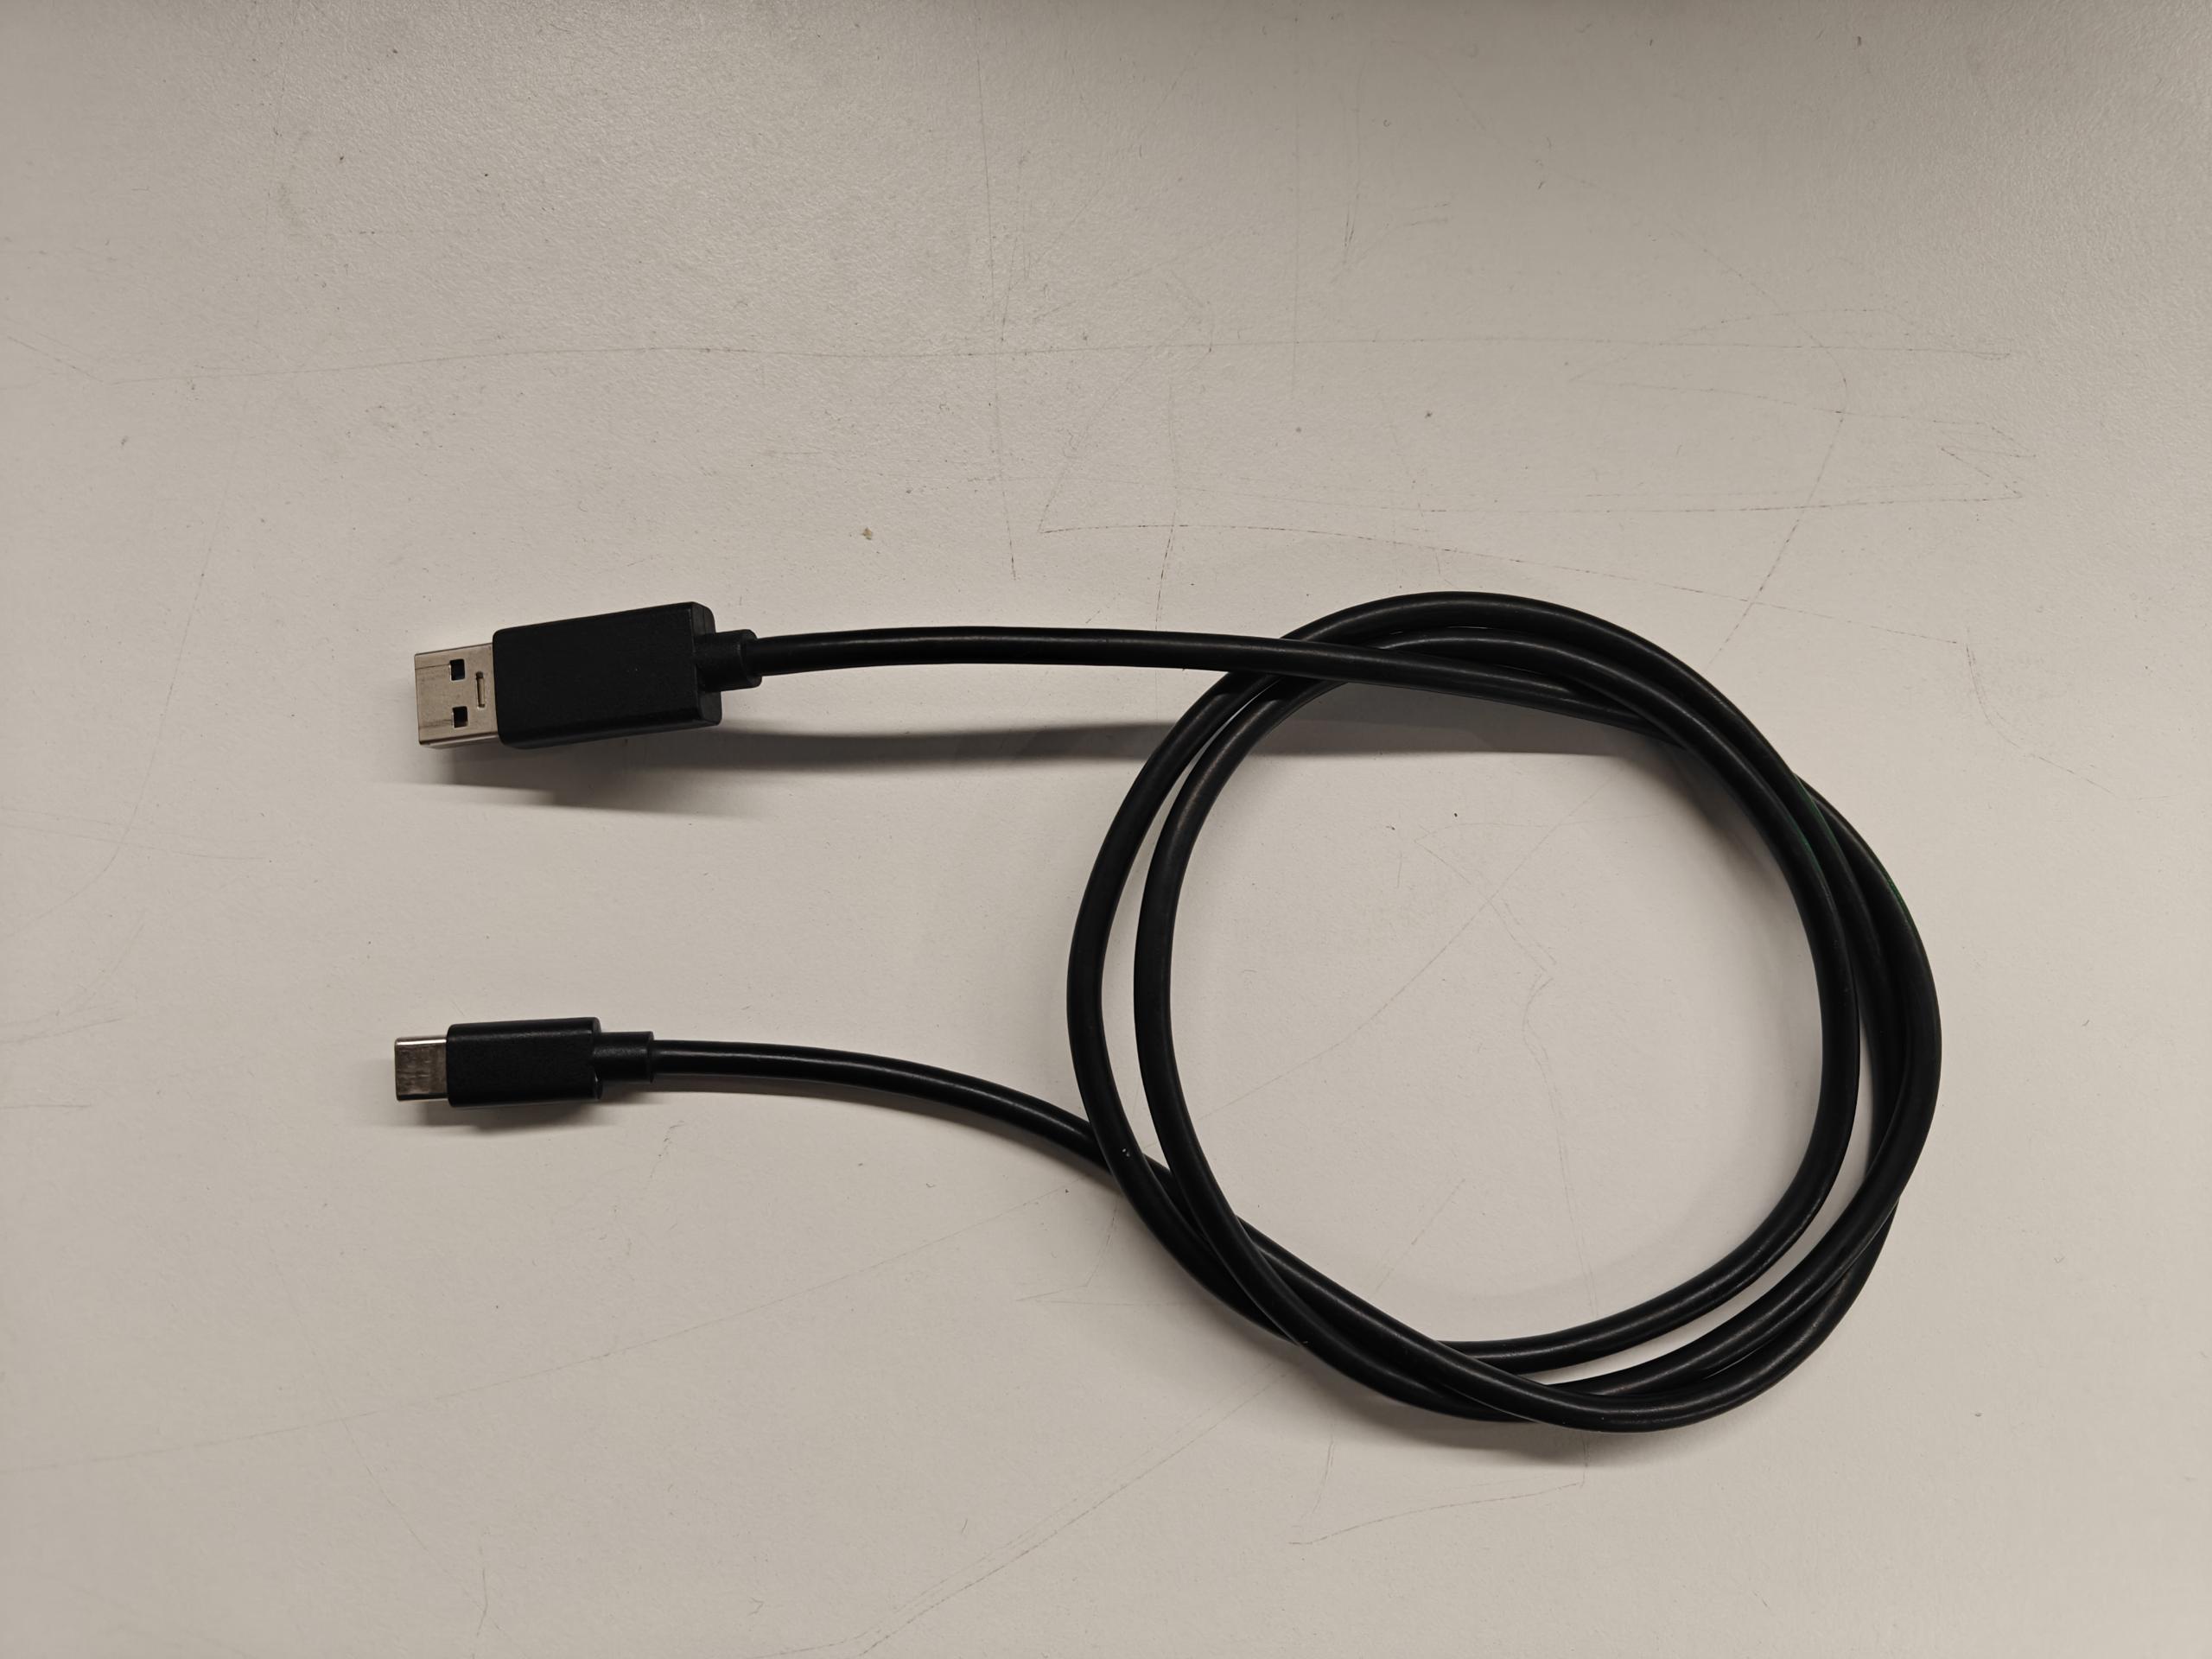
- After the device is powered on, use a USB Type-A to Type-C cable to connect the computer and the device. The Type-A end connects to the computer, and the Type-C end connects to the device.
- After connecting, on the Windows computer, press WIN + R, type
cmd, and executeadb devicesin the opened window. Connected devices will be listed. If none are listed, wait a moment or unplug and re-plug the Type-C cable and execute the command again.
adb devices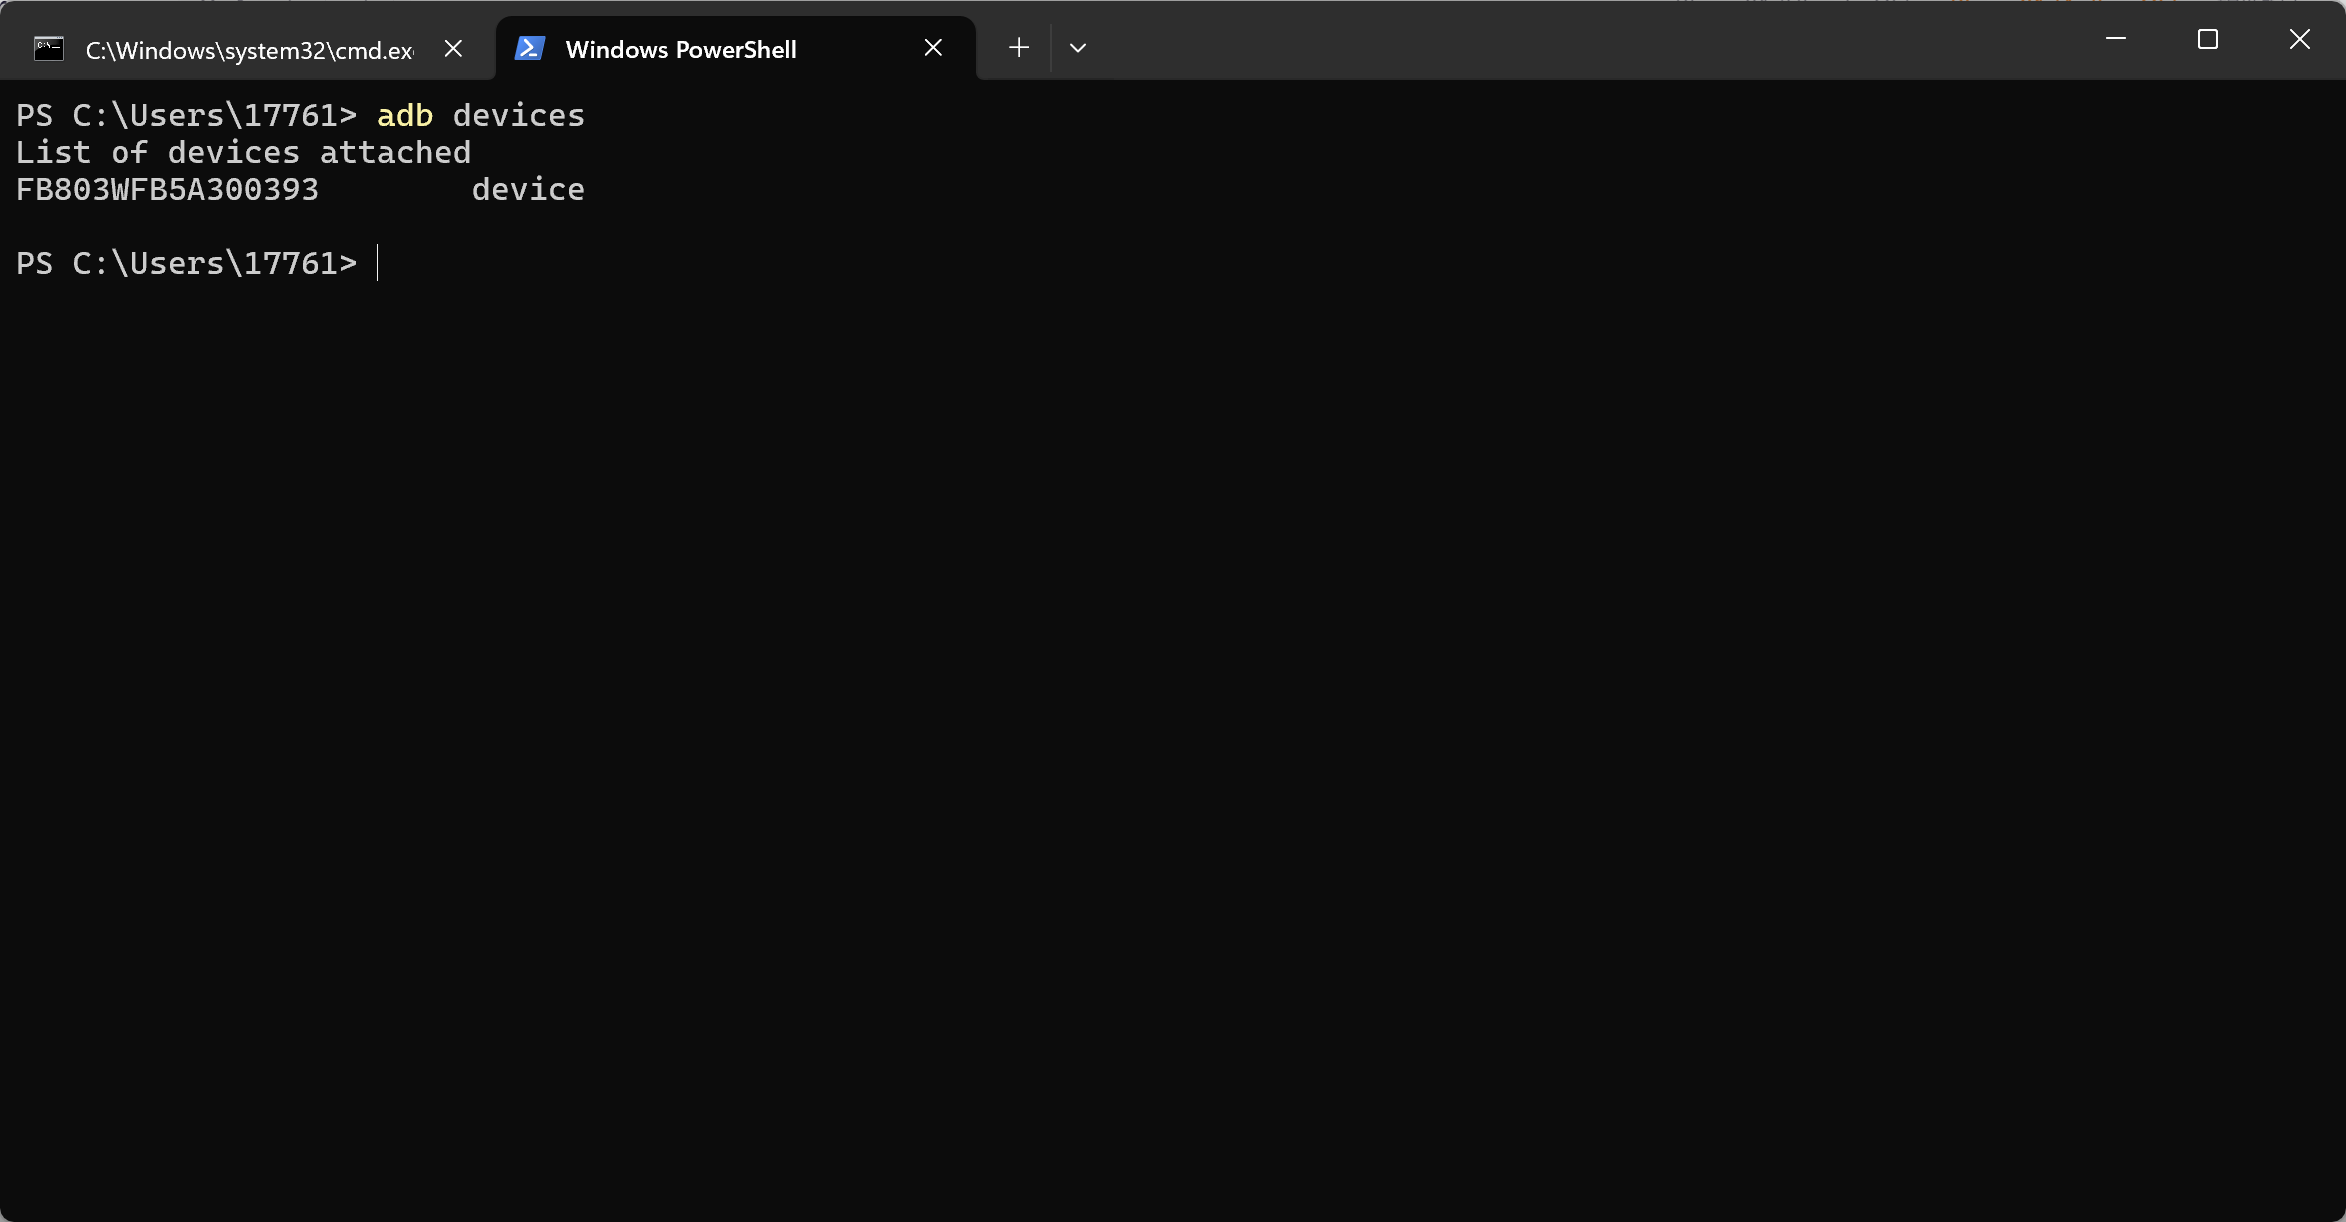
- Switch to flashing mode by executing:
adb reboot edl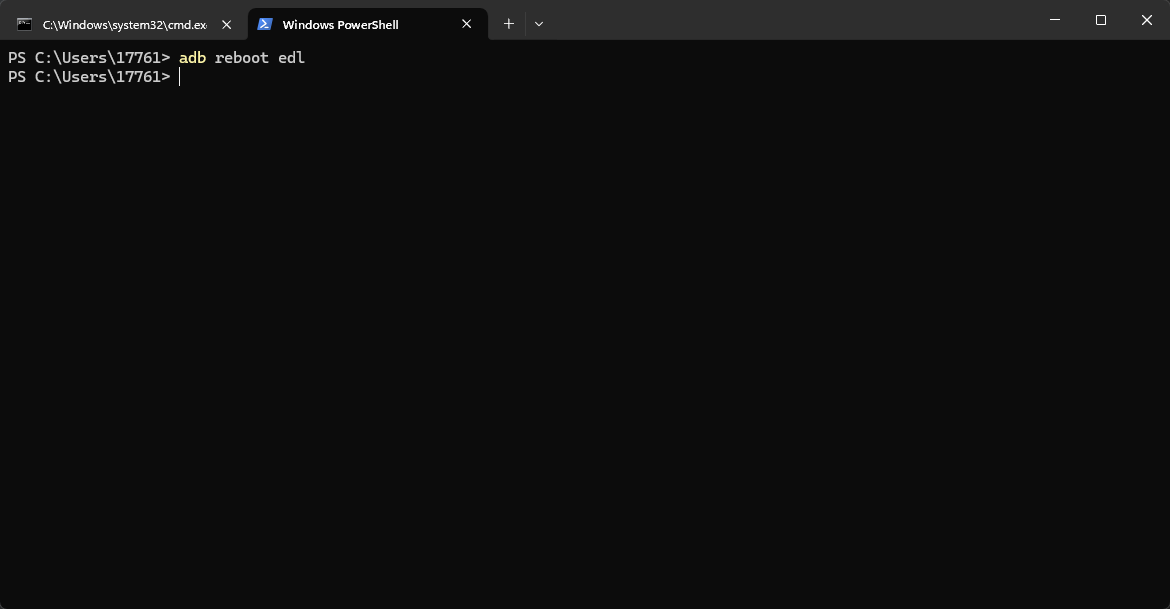
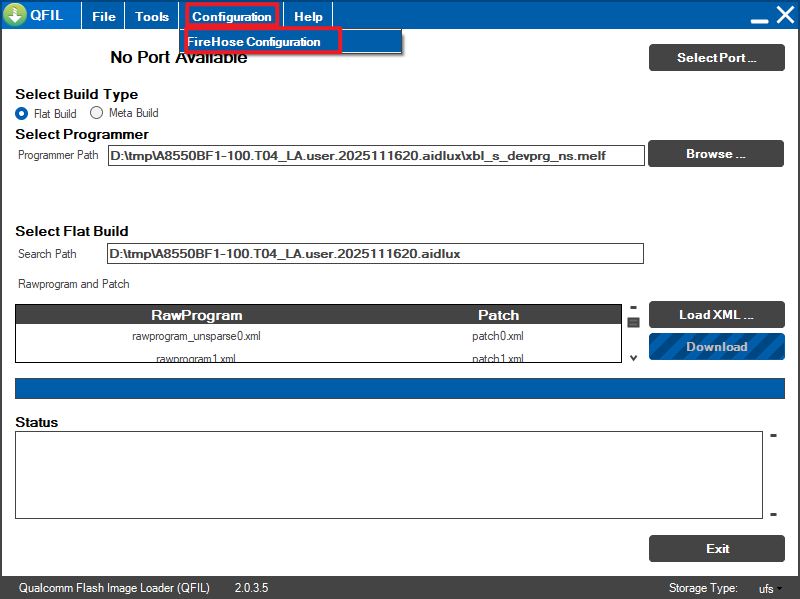
Configuring QFIL's Configuration Item
- Open QFIL, and click on Configuration - FireHose Configuration at the top.
- In the pop-up Download Configuration window, make the following settings:
Select 0-Sahara for Download Protocol
Select ufs for Device Type
Check the Reset After Download option
Ensure other options remain consistent with the screenshot below.
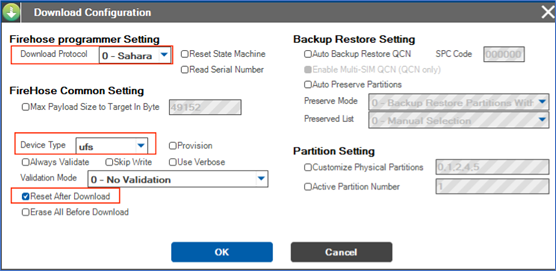
- After configuration, click
OKto save.
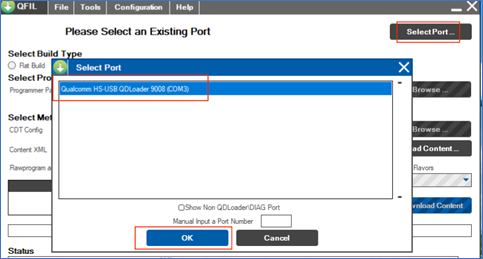
Selecting the Flashing Port
Click the
Select Portoption, and in the pop-up window, select the appearing9008port, then clickOK.After switching to flashing mode, the
9008port should appear automatically in this window. If it does not appear, disconnect the power, restart, execute the switch command again, and wait for it to appear.
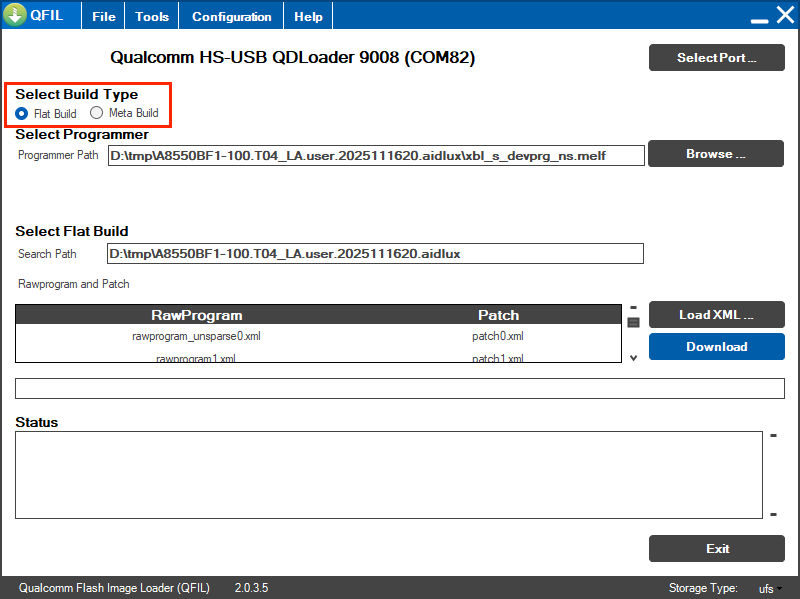
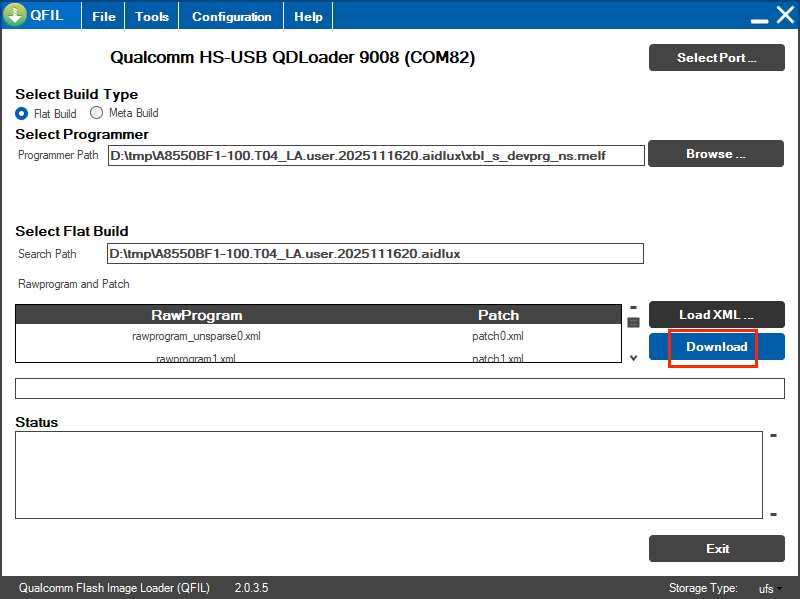
Selecting Build Type
- Find the
Select Build Typeitem and selectFlat Build.
Selecting the Flashing File
Unzip the ROM file. We will use the "A8550BF1-100.T04_LA.user.2025111620.aidlux" version as an installation example.
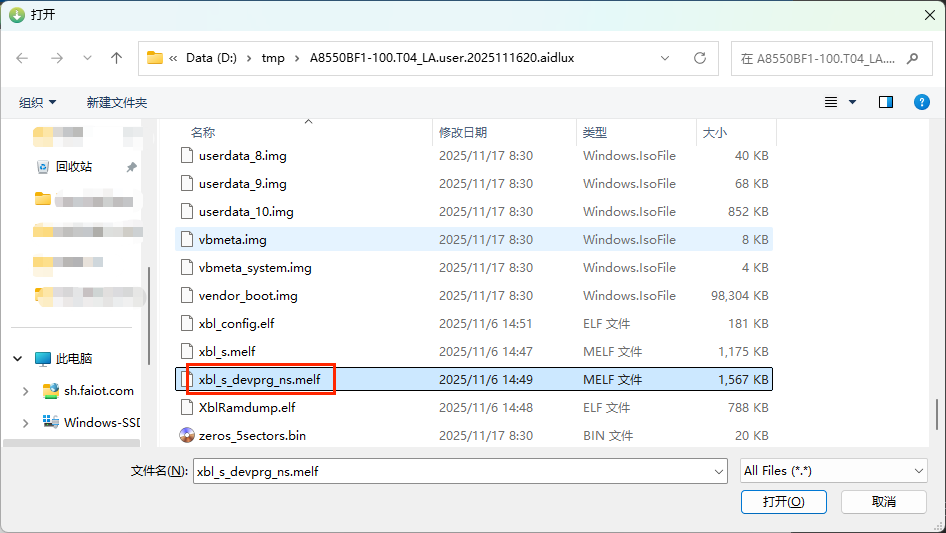
Find the
Select Programmeritem, clickBrowse...next to Programmer Path, navigate to the unzipped path, and select the unzipped ROM file.
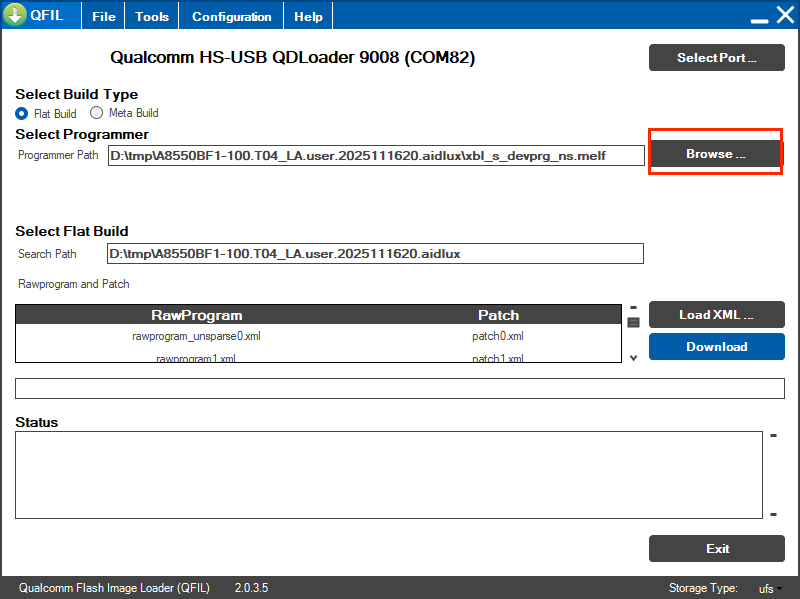
- Change the file view suffix to All Files (*.*).
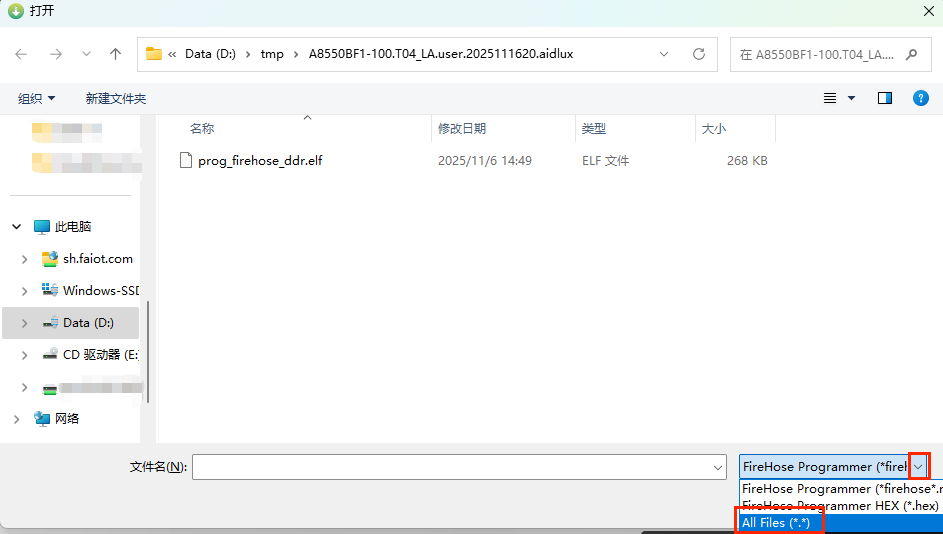
- Select the
xbl_s_devprg_ns.melffile and clickOpen.
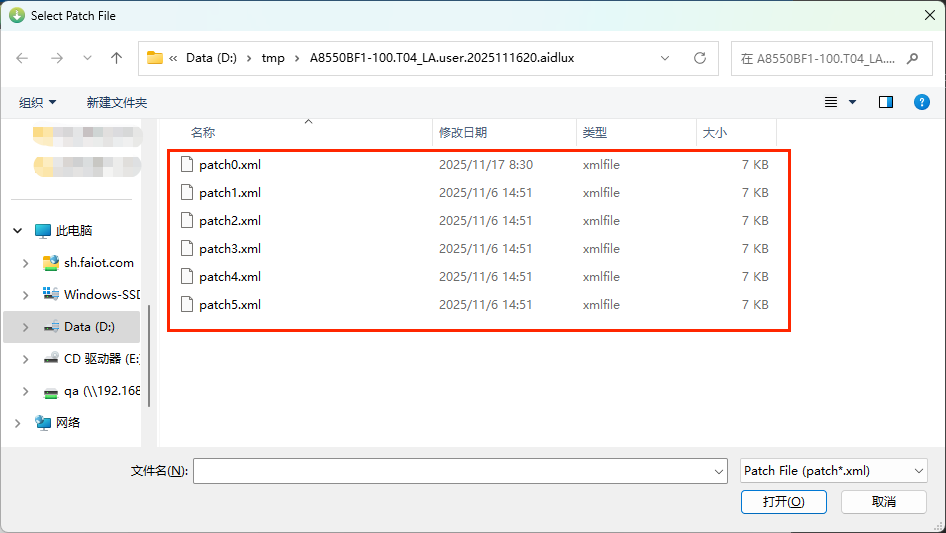
Selecting the Flashing XML File
- Find the
Select Flat Builditem, clickLoad XML...below it, and select the flashing XML file.

- In the pop-up window, select All Files and click
Open.
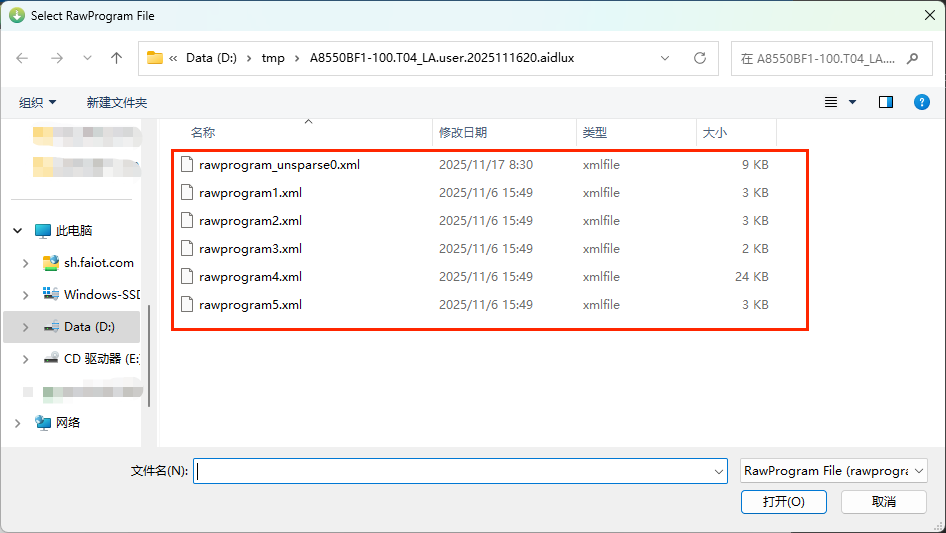
- The interface will automatically pop up another window. Select All Files and click
Open.
Starting the Flashing
- Once all the above options are selected, click
Downloadto start flashing.
- Wait for approximately 5 minutes. When
successfuappears, the flashing is complete. If flashing fails, please contact Aplux after-sales personnel.
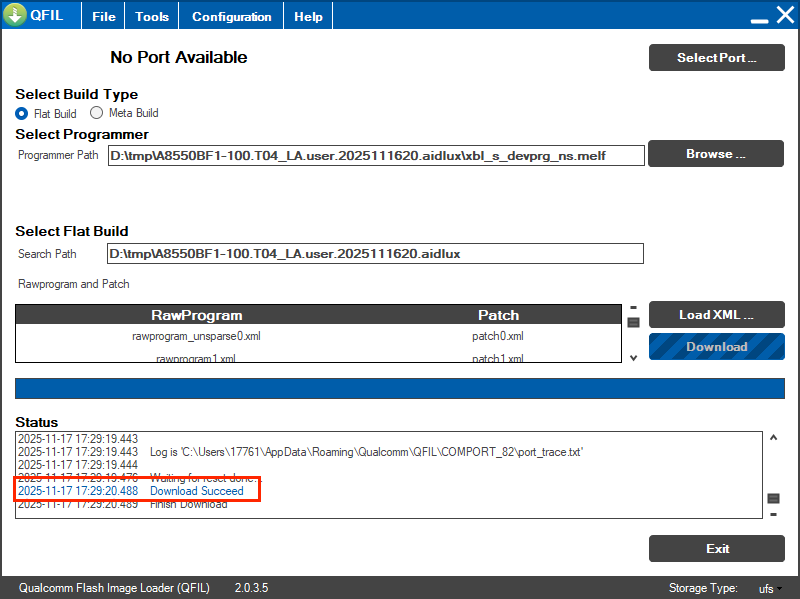
- After flashing is complete, the system will automatically reboot.
AidLux System Initialization
After installing the full system package, AidLux is pre-installed on the Android system, but the user needs to manually click the AidLux icon to initiate initialization. The system is ready to use once initialization is complete.
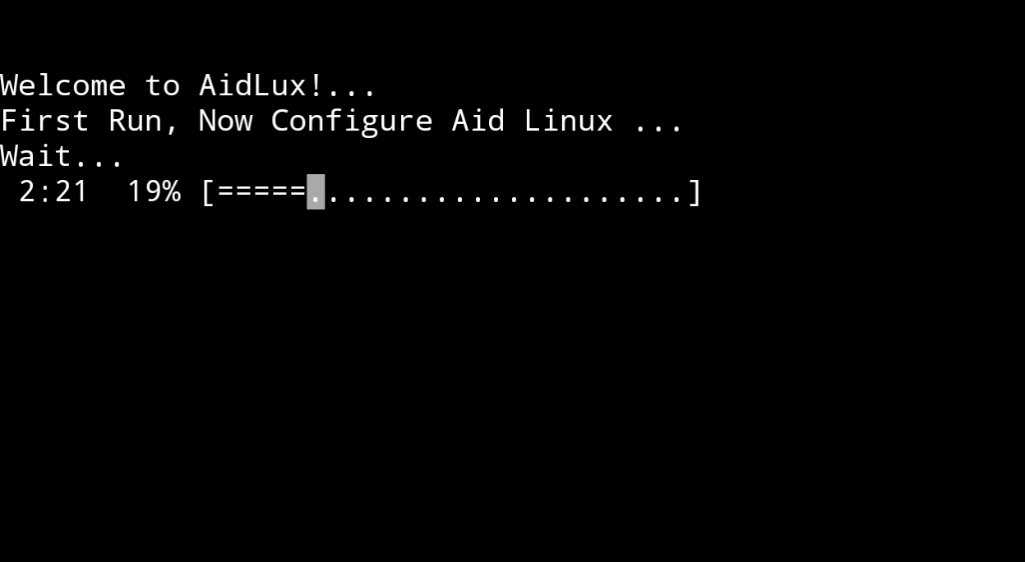
- On the Android home screen, use the left mouse button to click and swipe up on the desktop to open the AidLux icon and start initialization.

- When the system initialization progress reaches 100%, the system installation is complete.