Ubuntu System Installation
Reminder
Flashing will format the system. Back up your data in advance.
Install Flashing Tools
Before using Rhino Pi, install the required software on your local Windows PC:
- USB driver: USB_Driver_qud.win.1.1_installer_10061.1.zip
- Flashing tool: QPST_2.7.496.zip
- ADB tools: platform-tools.zip
Software download link: Download software toolkit
USB Driver Installation
Extract the
USB_Driver_qud.win.1.1_installer_10061.1.zipfile.After extraction, double-click the
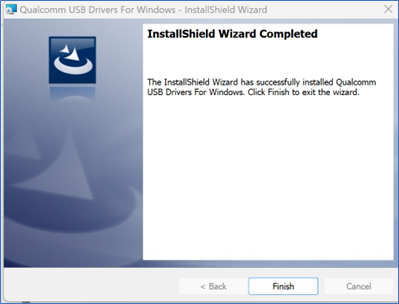
setup.exeprogram and wait for theQualcomm USB Driversinstallation interface to appear. Follow the prompts and clicknextto complete the installation.
Flashing Tool Installation
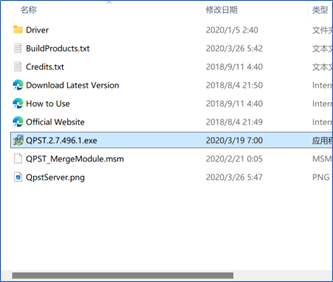
Extract the
QPST_2.7.496.zipfile to the current folder.Navigate to the extracted
QPST_2.7.496directory and double-click theQPST.2.7.496.1.exeprogram to start the installation.
Follow the prompts and click
nextcontinuously to complete the installation.Default installation path after completion:
C:\Program Files (x86)\Qualcomm\QPST\bin.You can navigate to this directory and send the
QFIL.exeprogram to the desktop.
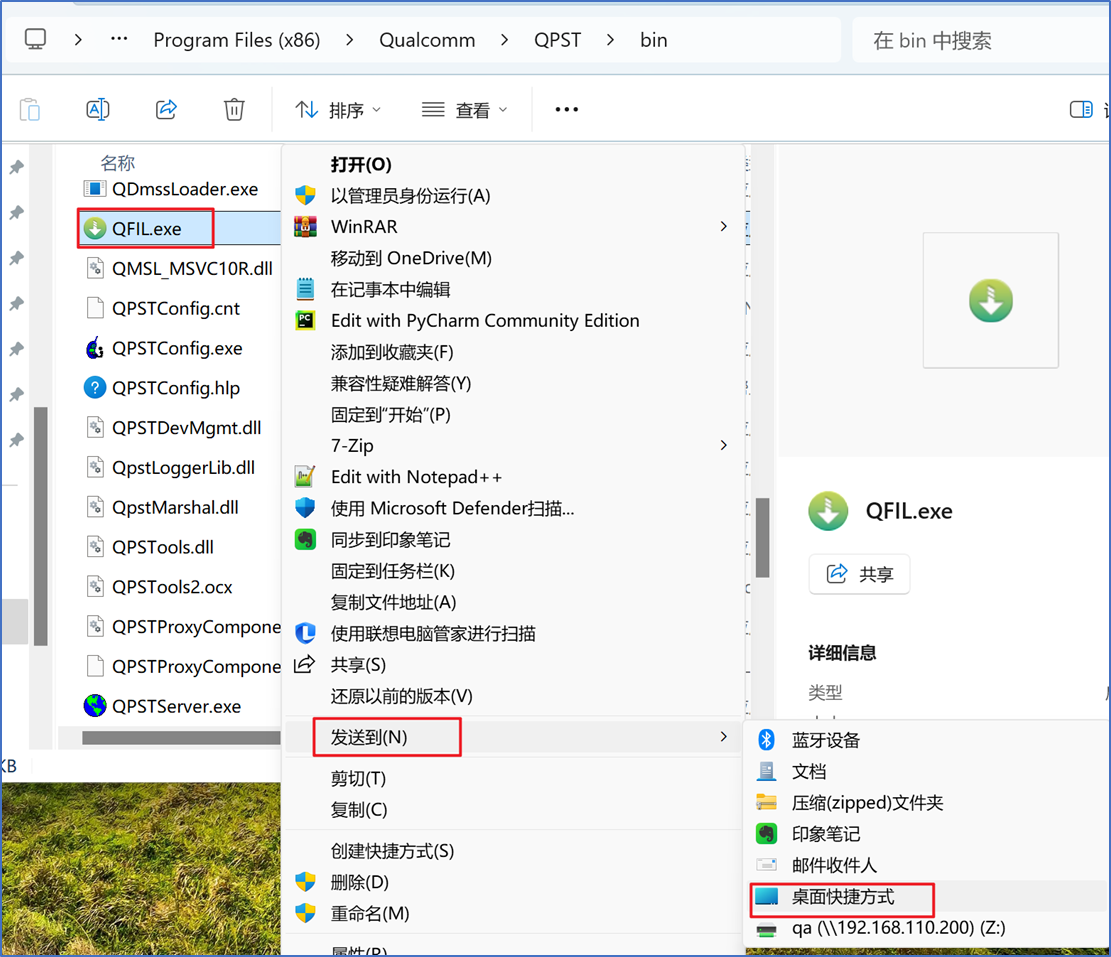
- The desktop icon is as follows.
![]()
ADB Tool Installation
- Unzip
- Extract the
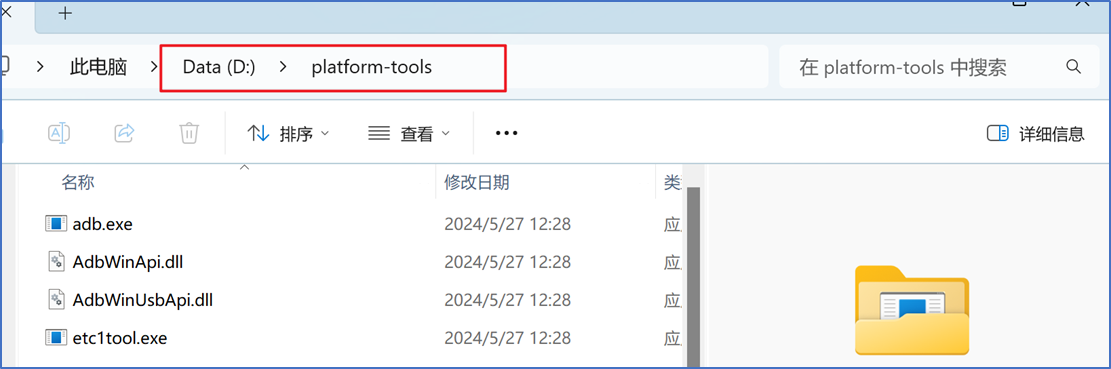
platform-tools.zipfile to the D drive.
- Configure ADB Environment Variables
- Copy the path of the extracted
platform-toolsfolder.
- Right-click "This PC" and select "Properties".
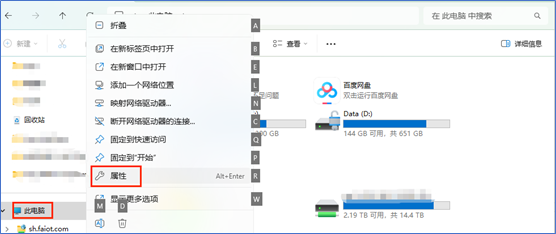
- In the pop-up settings window, click "Advanced system settings".
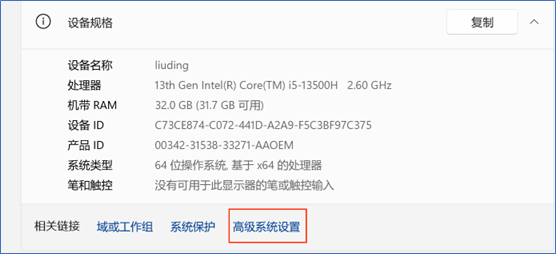
- In the Advanced tab of the pop-up System Properties window, click "Environment Variables".
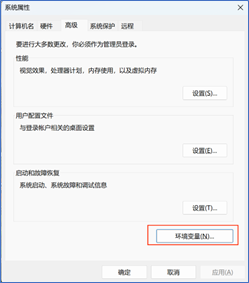
- In the pop-up Environment Variables window, select the Path variable in the "System variables" section and click "Edit" below.
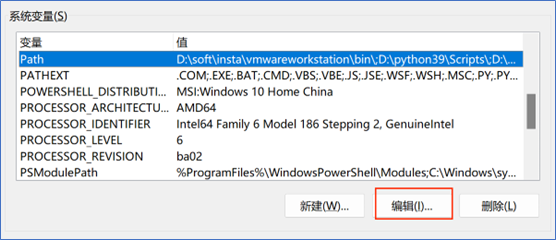
- In the pop-up Edit Environment Variable window, click "New" and add the previously copied platform-tools path.
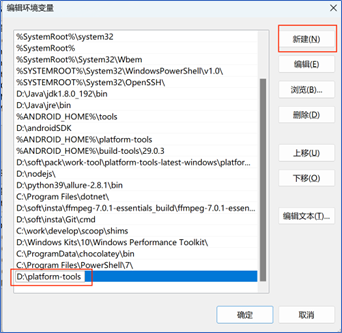
- Click "OK" in sequence to save the variable settings and exit.
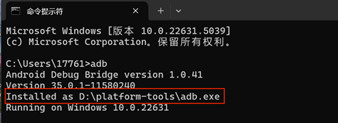
- Verify if the ADB Environment Configuration is Available
- Open the
cmdwindow and enteradb. No error is reported.
System Installation
Switch to Flash Mode
- After boot, use a USB Type-A to Type-C cable to connect the PC and device. Type-A goes to the PC USB port, Type-C goes to the device.
- On Windows, press WIN+R, enter
cmd, and runadb devicesin the opened window. Connected devices should be listed. If not, wait a moment or reconnect the Type-C cable and run again.
adb devices
- Run
adb shell reboot edlto switch to flash mode.
adb shell reboot edl
Configure QFIL
- Open QFIL and click Configuration - FireHose Configuration.
- In the Download Configuration window, set:
Download Protocol: 0-Sahara
Device Type: ufs
Enable Reset After Download
Keep all other options the same as in the screenshot.
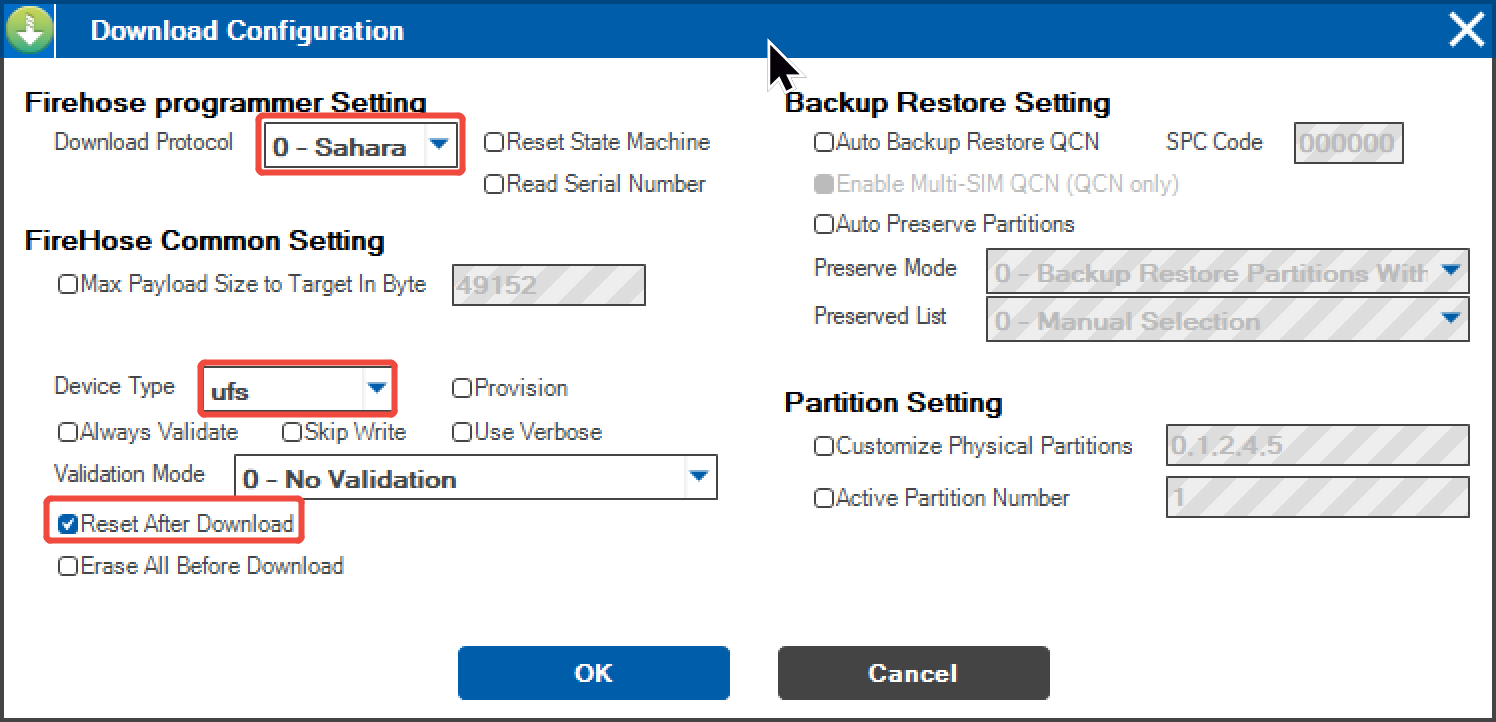
- Click OK to save.
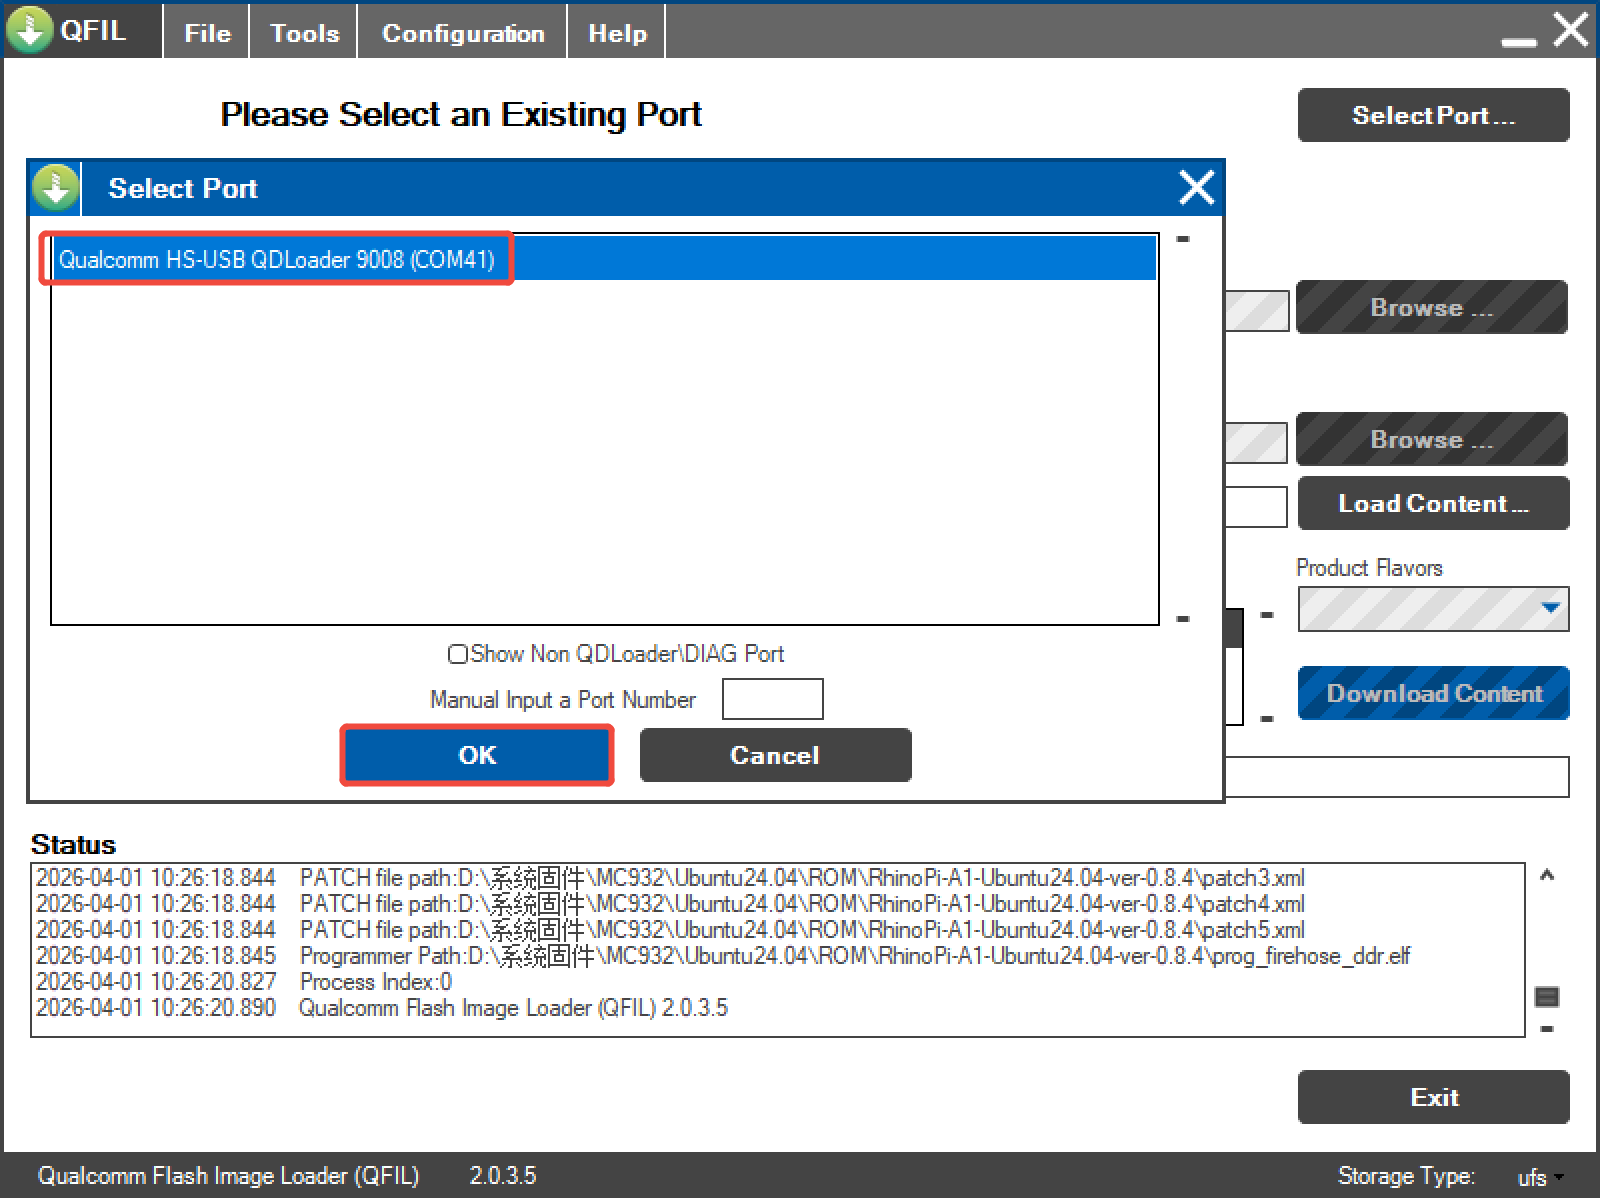
Select Flash Port
- Click
Select Port, choose the9008port in the popup, then clickOK. - After switching mode as described in Switch to Flash Mode, port 9008 should appear automatically. If not, power-cycle the device, switch mode again, and wait.
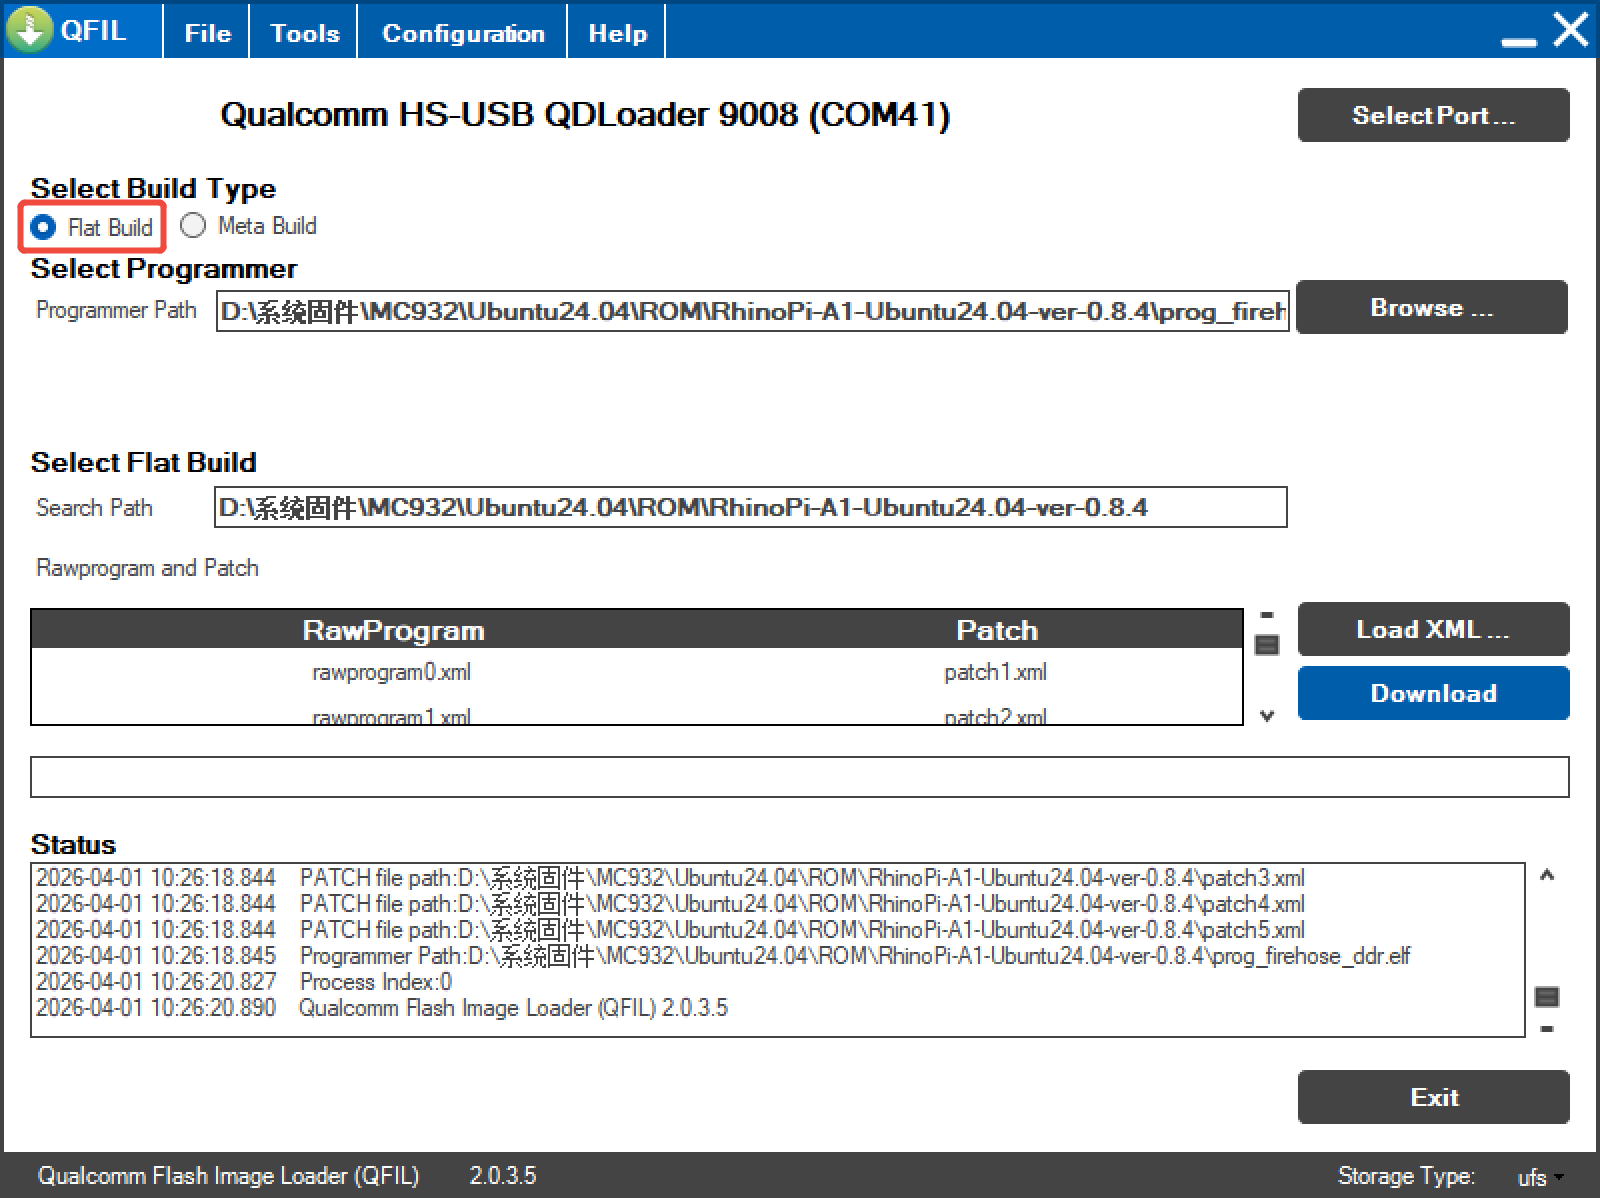
Select Build Type
- Find
Select Build Typeand chooseFlat Build.
Select Flashing File
- Extract the ROM package. Example version:
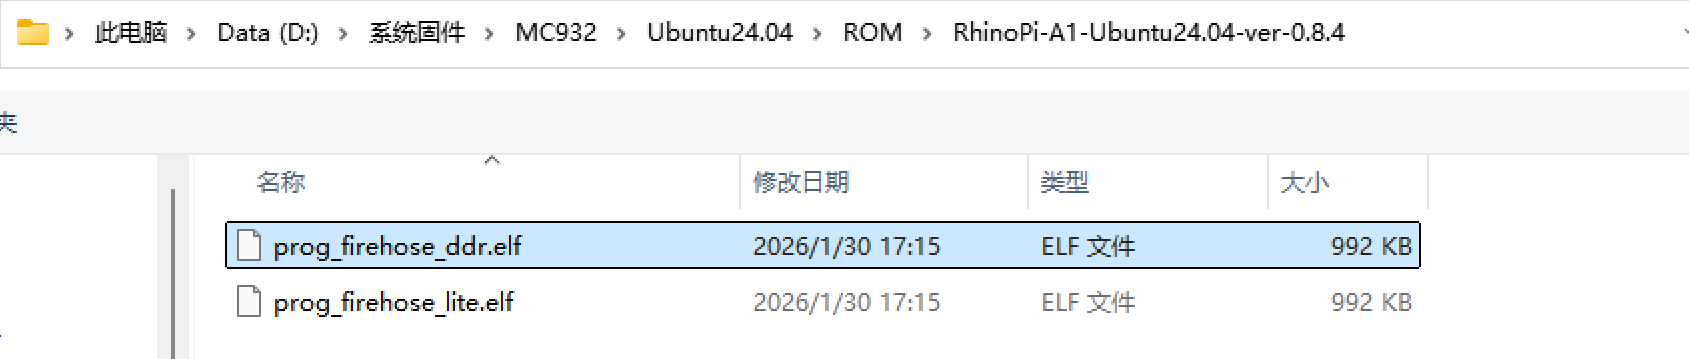
RhinoPi-A1-Ubuntu24.04-ver-0.8.4. - Find
Select Programmer, clickBrowse...next toProgrammer Path, and select the extracted ROM directory. - Select
prog_firehose_ddr.elf, then click Open.
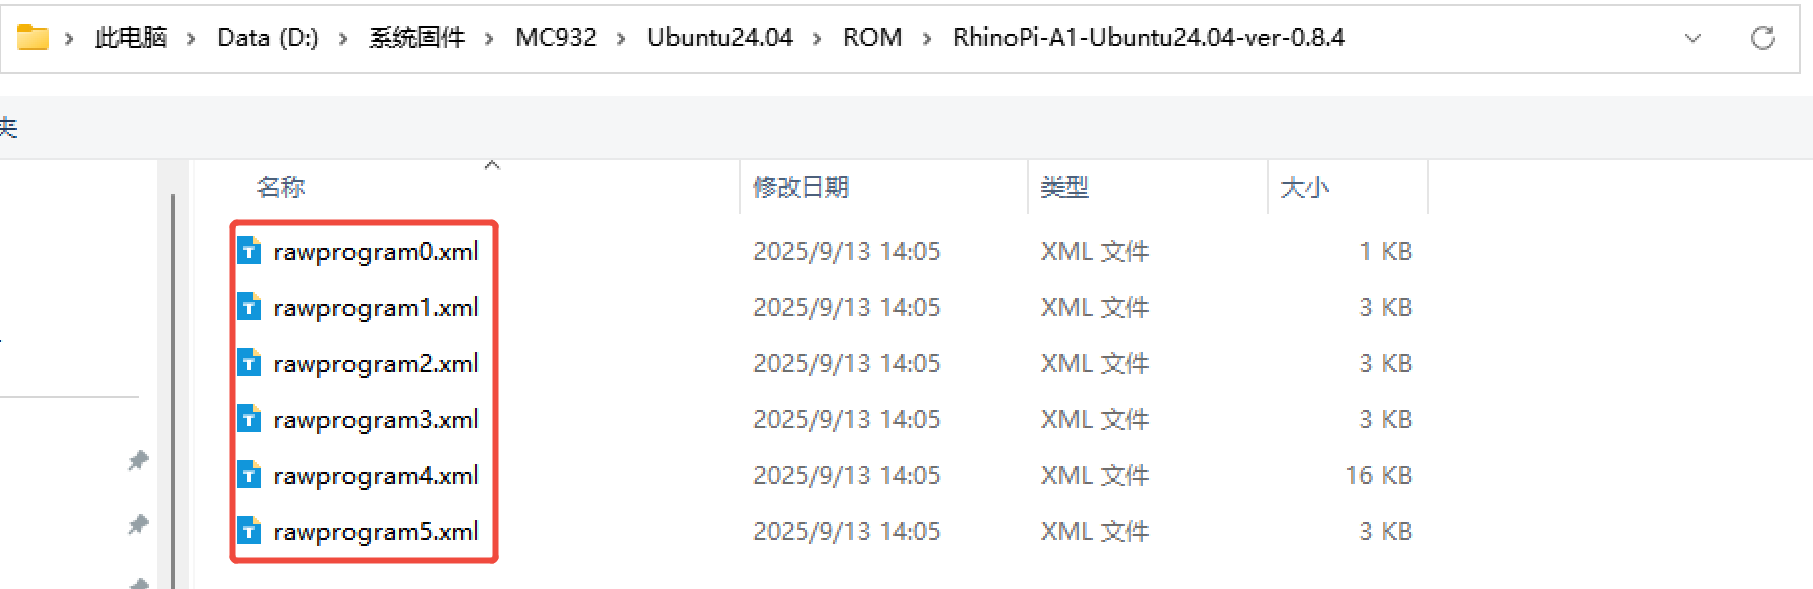
Select Flashing XML Files
- Find
Select Flat Build, clickLoad XML..., and choose the flashing XML files. - In the popup, select all files and click Open.
- Another popup appears automatically; select all files and click Open.
Start Flashing
- After all options are configured, click
Downloadto start flashing.
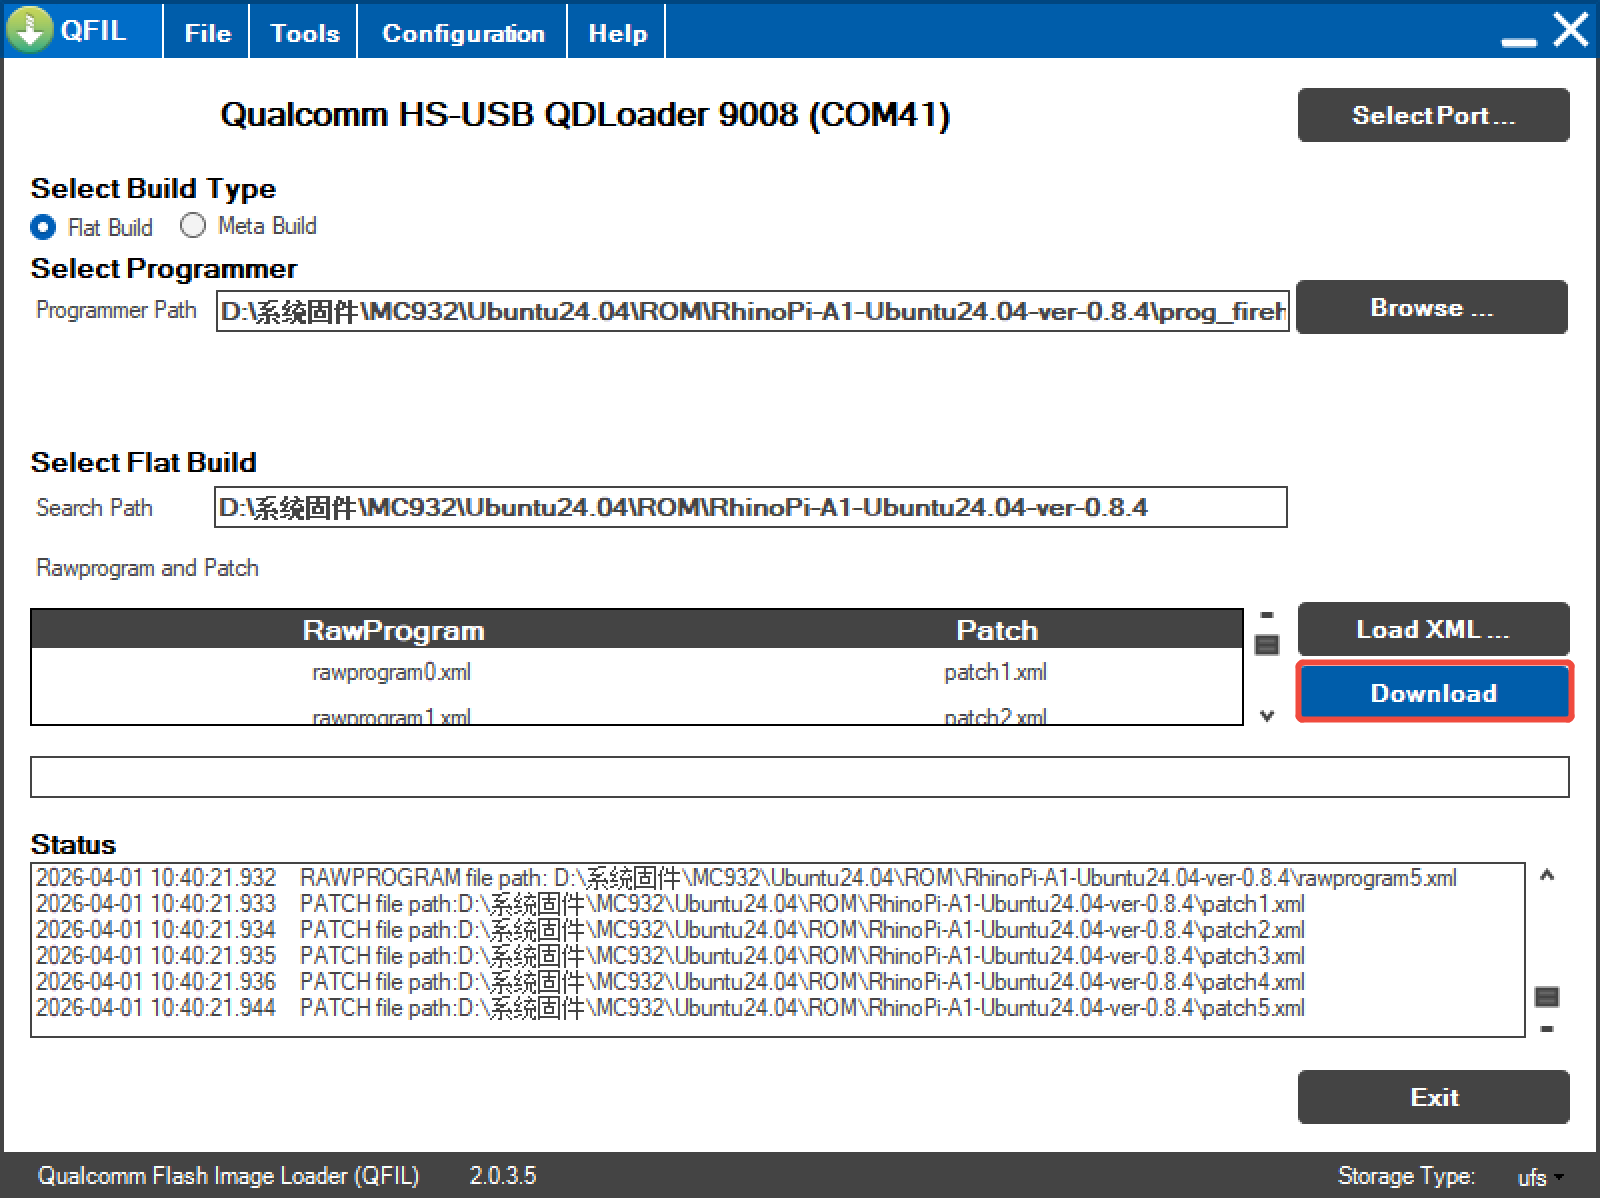
- Wait about 5 minutes. If
successfulappears, flashing is complete. If flashing fails, contact Aidlux after-sales support.
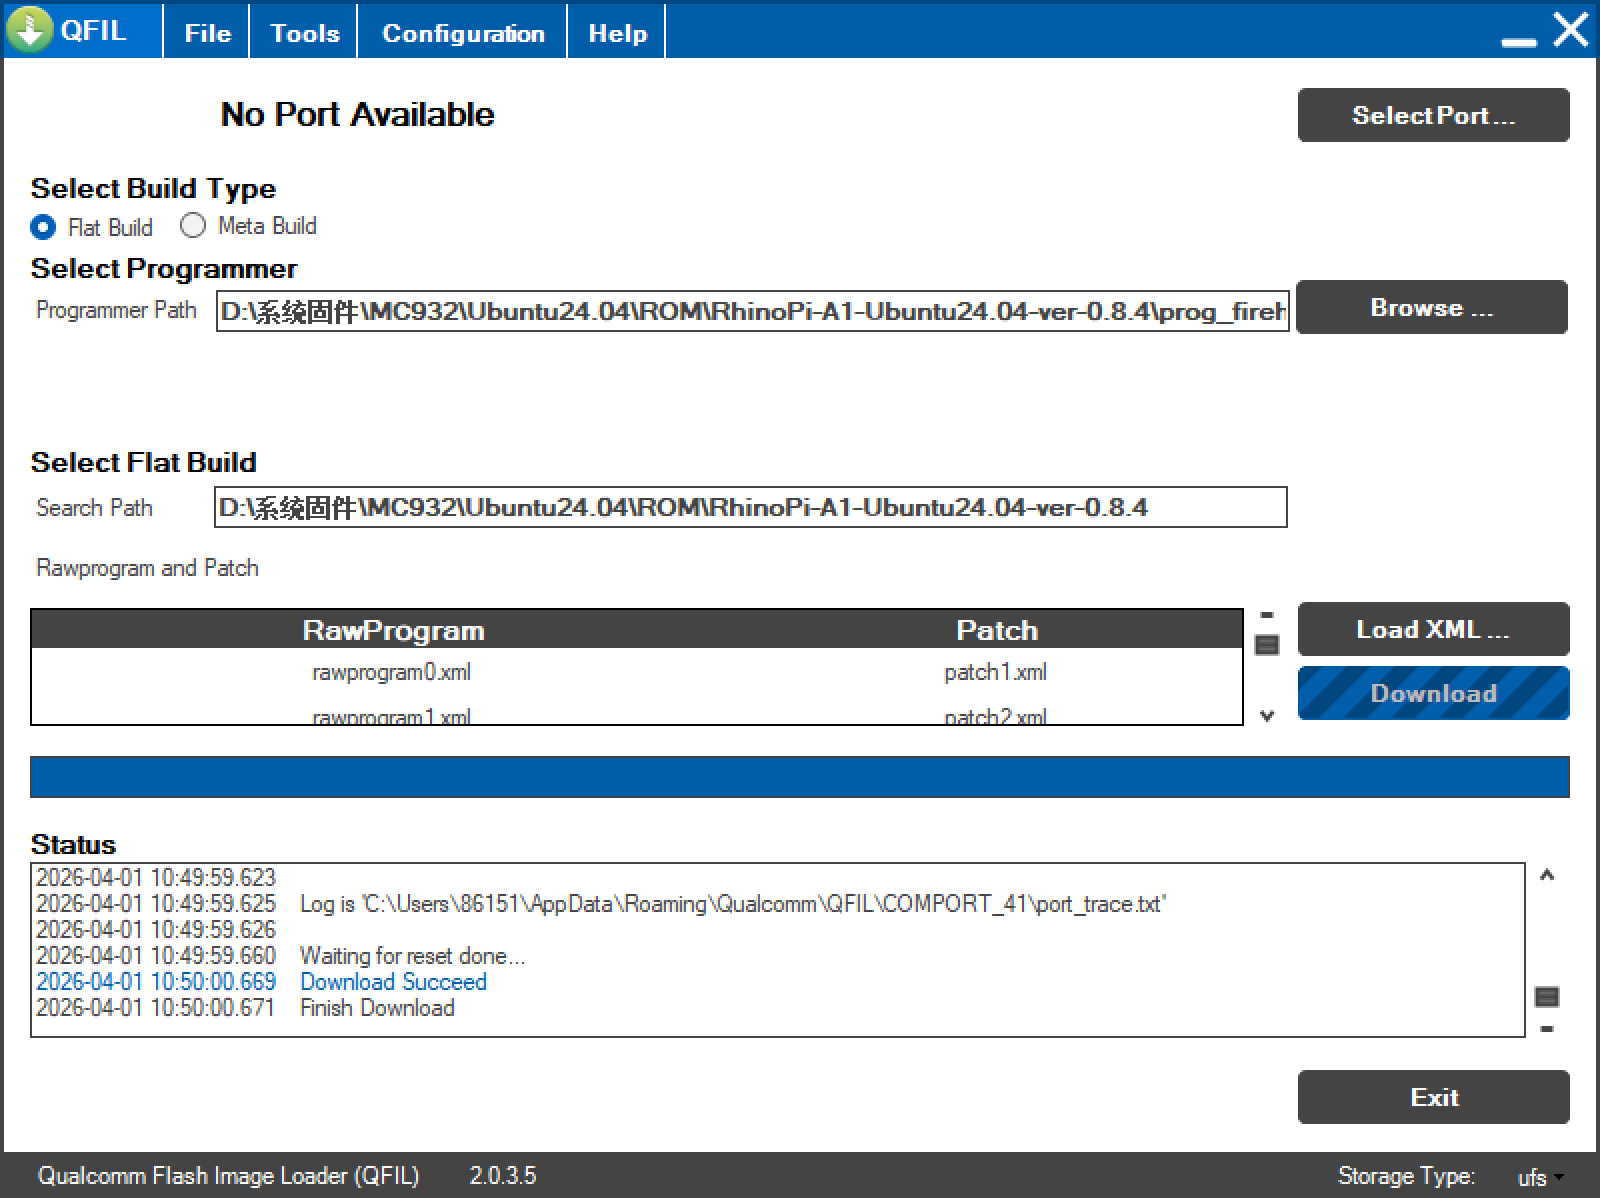
- After flashing finishes, the system will reboot automatically.