Edge Deployment of HY-MT1.5-1.8B
Introduction
HY-MT1.5-1.8B is Tencent's Hunyuan translation model version 1.5, an upgraded version of the WMT25 champion model. It has been optimized for interpretive translation and mixed-language scenarios, with added support for terminology intervention, contextual translation, and formatted translation. Although HY-MT1.5-1.8B has less than one-third the parameters of HY-MT1.5-7B, its translation performance is comparable to larger models, balancing high speed with high quality. After quantization, the 1.8B model can be deployed on edge devices and supports real-time translation scenarios, offering broad application prospects.
This chapter demonstrates how to deploy, load, and perform translation with HY-MT1.5-1.8B on edge devices. Two deployment methods are provided:
- AidGen C++ API
- AidGenSE OpenAI API
In this case, the LLM inference runs on the device side. Relevant interfaces are called through code to receive user input and return conversation results in real-time.
- Device: IQ8275
- System: Ubuntu 24.04
- Model: HY-MT1.5-1.8B
Supported Platforms
| Platform | Operation Mode |
|---|---|
| IQ8275 | Ubuntu 24.04 |
Prerequisites
IQ8275 hardware
Ubuntu 24.04 system
System Dependency Configuration
Configure the AidLux Package Source
# Download the correct public key
sudo wget -O- https://archive.aidlux.com/ubuntu24/public.key | gpg --dearmor | sudo tee /etc/apt/trusted.gpg.d/private-aidlux.gpg > /dev/null

# Edit the source list file
sudo vim /etc/apt/sources.list.d/private-aidlux.list

# Add the repository provided by AidLux to the source file
deb [arch=arm64 signed-by=/etc/apt/trusted.gpg.d/private-aidlux.gpg] https://archive.aidlux.com/ubuntu24 noble main

#  Update the package cache
sudo apt update
After the update is complete, you can use the following command to retrieve the official AidLux SDK dependencies:
sudo apt list | grep aid | grep unknown# Install software
# Must be installed first (not included with the system)
sudo apt install python3 python3-pip libopencv-dev python3-opencv net-tools
# Must be installed before aidlite
sudo apt install aidlux-aistack-base aidrtcm
# Install aidlite and dependencies
sudo apt install aid-lms aidlms-sdk aidlite-sdk cmake
sudo apt-get install libfmt-dev nlohmann-json3-dev
sudo apt install aidlite-*
# DSP support
sudo apt-get install qcom-fastrpc1
sudo apt-get install qcom-fastrpc-dev
# Install aidgen-sdk
sudo apt install aidgen-sdk
sudo apt install aidgen-qnn236
sudo apt install aidgen-qnn240
# Install mms service
sudo apt install aid-mms
# GPU support
sudo apt-add-repository -s ppa:ubuntu-qcom-iot/qcom-ppa
sudo apt install qcom-adreno-cl1
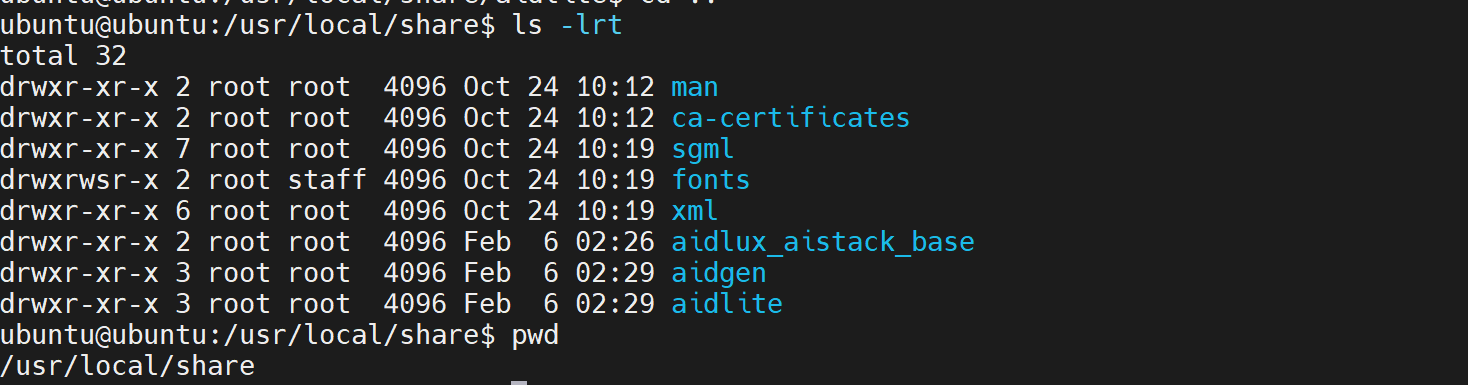
sudo ln -s /usr/lib/aarch64-linux-gnu/libOpenCL.so.1 /usr/lib/aarch64-linux-gnu/libOpenCL.soAfter installation, check that the aidlite and aidgen directories have been added under /usr/local/share:
Device Authorization
Obtain the Device Serial Number
cat /sys/devices/soc0/serial_numberObtain the License File
Provide the serial number to APLUX technical staff to generate a device-specific License file, then place it in the /etc/opt/aidlux/license/AidLuxLics directory.
Activate the License
sudo /opt/aidlux/cpf/aid-lms/manager.sh restartAidGen Case Deployment
Step 1: Copy the AidGen SDK Code Example
# Copy the test code
cd /home/ubuntu/aidllm

cp -r /usr/local/share/aidgen/examples/ ./
Step 2: Download Model Resources
Since HY-MT1.5-1.8B is currently in the Model Farm Preview section, you need to use the
mmscommand to obtain it.
Using mms requires a Model Farm account login. Please visit Model Farm Account Registration
# Login
mms login

# Search for the model
mms list HY

# Download the model
mms get -m HY-MT1.5-1.8B -p w4a16 -c qcs8550 -b qnn2.36 -d /home/ubuntu/aidllm/hy-mt

cd /home/ubuntu/aidllm/hy-mt
unzip qnn236_qcs8550_cl2048.zip
mv qnn236_qcs8550_cl2048/* /home/ubuntu/aidllm
Step 3: Create Configuration File
cd /home/ubuntu/aidllm
vim hy-mt-aidgen-config.json
Create the following json configuration file:
{
    "backend_type": "genie",
    "prefix_path": "kv-cache.primary.qnn-htp",
    "model": {
        "path": [
            "hy-mt1.5-1.8b_qnn236_qcs8550_cl2048_1_of_2.serialized.bin.aidem",
            "hy-mt1.5-1.8b_qnn236_qcs8550_cl2048_2_of_2.serialized.bin.aidem"
        ]
    }
}
Step 4: Verify Resource Files
The file layout is as follows:
/home/ubuntu/aidllm
├── aidgen_chat_template.txt
├── chat.txt
├── htp_backend_ext_config.json
├── hy-mt1.5-1.8b-htp.json
├── hy-mt-aidgen-config.json
├── kv-cache.primary.qnn-htp
├── hy-mt1.5-1.8b-tokenizer.json
├── hy-mt1.5-1.8b_qnn236_qcs8550_cl2048_1_of_2.serialized.bin.aidem
├── hy-mt1.5-1.8b_qnn236_qcs8550_cl2048_2_of_2.serialized.bin.aidem
├── examples
Step 5: Set the Conversation Template
💡Note
Refer to the aidgen_chat_template.txt file in the model resource package for the conversation template.
Modify the test_aidgen_text.cpp file according to the model's template:
std::string system_prompt =
"<|hy_begin▁of▁sentence|><|hy_place▁holder▁no▁3|>\n"
"<|hy_begin▁of▁sentence|>\n"
"<|hy_User|>Translate the following segment into Chinese, without additional explanation.\n\n";
// User turn: wraps user input + triggers assistant generation
auto make_user_turn = [](const std::string& text) -> std::string {
return text + "\n<|hy_Assistant|>";
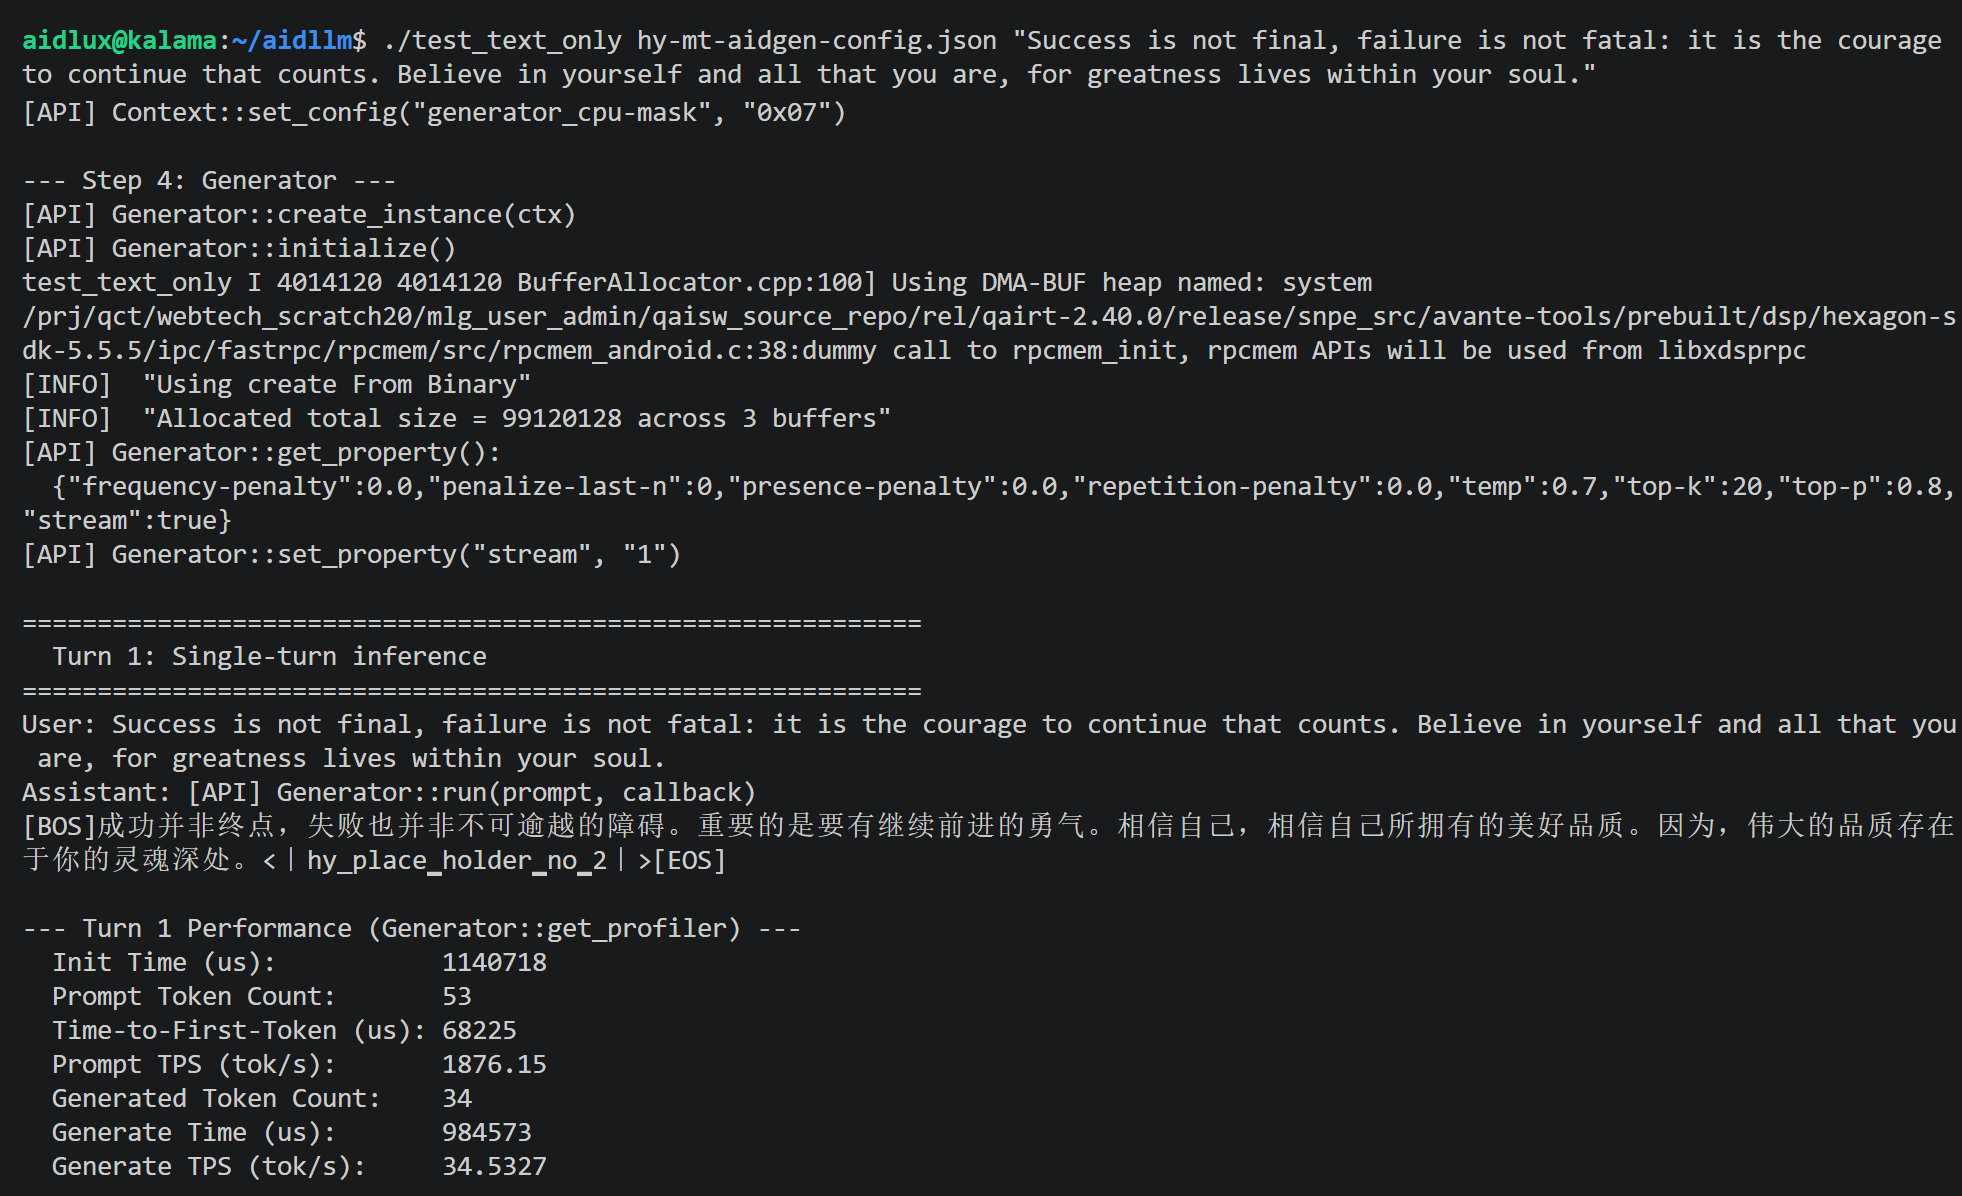
};Step 6: Build and Run
# Install dependencies
cd /home/ubuntu/aidllm/examples

# Build
mkdir build && cd build
cmake .. && make

mv test_text_only /home/ubuntu/aidllm/

cd /home/ubuntu/aidllm/
./test_text_only hy-mt-aidgen-config.json "Success is not final, failure is not fatal: it is the courage to continue that counts. Believe in yourself and all that you are, for greatness lives within your soul."